 Shouguang Clover Agricultural Facilities Co., Ltd
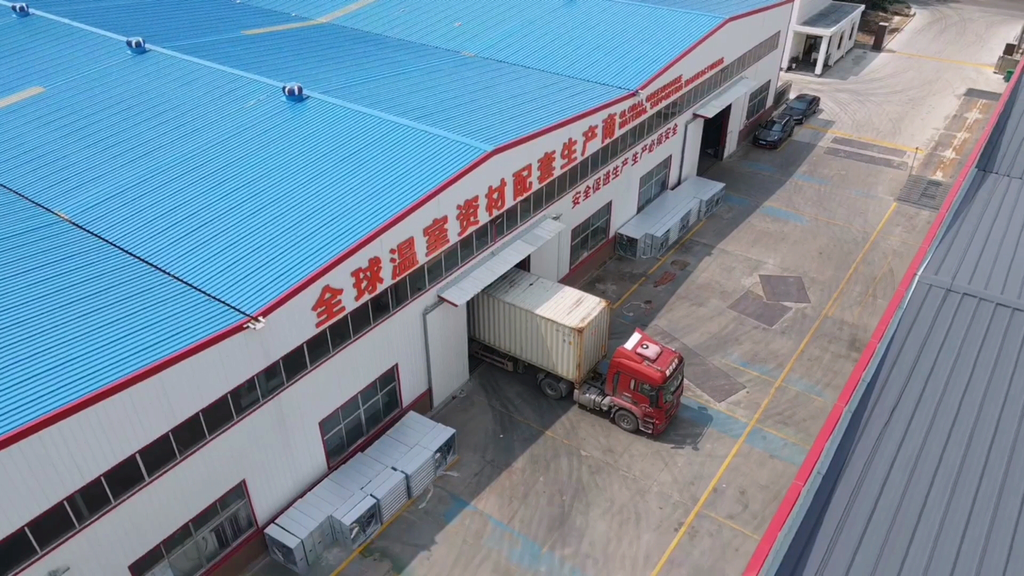
From site selection to commissioning — a professional’s blueprint for a durable, high-yield growing structure.
Introduction
A greenhouse is more than a frame with plastic over it. It is a controlled-environment agricultural system — engineered to withstand local wind and snow loads, regulate temperature and humidity, and deliver consistent crop yields year after year. Whether you are building a small commercial tunnel or a multi-hectare glass greenhouse complex, the process follows the same fundamental sequence.
At Clover Greenhouse, we have designed, manufactured, and installed greenhouse structures across four continents for over 20 years. This guide distills that experience into a clear, actionable roadmap — so you can approach your project with confidence, avoid costly mistakes, and end up with a structure that performs
Step 1: Site Selection and Planning
Before any steel is ordered, the site must be evaluated. Poor siting is the most common cause of underperforming greenhouses — and the hardest to fix after construction.
Key factors to assess:
- Solar exposure: Choose a location with maximum year-round sunlight. In the Northern Hemisphere, an east-west orientation generally captures more winter light; north-south orientation reduces shading between rows in multi-span structures. Avoid proximity to tall trees, buildings, or terrain features that cast shadows.
- Wind exposure: Identify prevailing wind directions. Open, exposed sites may require increased structural steel specifications and windbreaks. Local wind load data (typically 0.35–0.70 kN/m²) must inform the frame design.
- Snow load: This is critical in cold climates. Parts of Kazakhstan, Mongolia, northern China, and Canada can experience snow loads of 1.0–1.8 kN/m² (equivalent to 50–90 cm of settled snow). The truss spacing, column size, and roof pitch must all be engineered for the local maximum — not the average.
- Drainage and topography: The site should be level or gently sloping for drainage. Low-lying areas risk water ingress and foundation issues. A perimeter drainage system is recommended where the water table is high.
- Access and utilities: Confirm road access for delivery trucks, and proximity to three-phase power, water supply, and fuel sources (natural gas line, propane, or coal storage).
Output of this stage: A site plan with dimensions, orientation, utility connections, and access roads marked.
Step 2: Choose the Right Greenhouse Type
Not every greenhouse is suitable for every crop or climate. Selecting the right type at the planning stage prevents costly retrofits.
表格
| Greenhouse Type | Covering | Best For | Span Range | Climate Suitability |
|---|---|---|---|---|
| Film greenhouse (tunnel) | Single/double PO or PE film | Low-cost vegetable production, nurseries | 6–12 m | Temperate, subtropical |
| Solar greenhouse (Chinese-style) | Film + thermal quilt | Passive winter production in cold regions | 8–12 m | Cold, sunny climates (–20 °C and below) |
| PC board greenhouse | Polycarbonate hollow sheet | Balanced durability and insulation | 8–12 m per span | Wide range; excellent for snow areas |
| Glass greenhouse (Venlo) | 4 mm tempered/hollow glass | High-value crops, research, retail | 9.6–12.8 m per span | All climates; longest service life |
Selection considerations:
- Crop type: Leafy greens and herbs tolerate lower light; tomatoes, peppers, and cucumbers demand high light and vertical trellising. Ornamentals and seedlings may need blackout or supplemental lighting.
- Budget: Film greenhouses cost 15–40 RMB/m² for the frame alone; PC board structures range 200–400 RMB/m²; Venlo glass greenhouses typically exceed 500 RMB/m² fully equipped.
- Climate: In regions with winter temperatures below –15 °C, a double-layer inflated film or PC board greenhouse with active heating is essential. In hot climates, prioritize natural ventilation, external shading, and fan-and-pad cooling.
Step 3: Structural Design and Engineering
Once the type is selected, the structure must be engineered to local codes and site-specific loads.
Core structural elements:
- Columns: Main posts carry vertical and lateral loads. Typical sizes range from 50×50×2.0 mm (small tunnels) to 120×120×3.0 mm (large multi-span glass/PC greenhouses). All steel should be hot-dip galvanized after welding to prevent rust — never settle for pre-galvanized tubing in a structure expected to last 15+ years.
- Trusses and arches: Truss depth and chord spacing are determined by span and snow load. For a 10 m span under 1.2 kN/m² snow, a 250 mm-deep truss with Φ42×2.0 top chord and Φ25×1.8 bottom chord is typical. Arch spacing (bay distance) is usually 1.0–2.0 m; in heavy-snow regions, reduce to 0.8 m.
- Gutters: Gutter height affects interior volume and ventilation. Typical gutter heights range from 3.0 m (vegetable production) to 6.0 m+ (high-wire tomatoes). Gutters should be hot-dip galvanized steel, minimum 2.0 mm thick, with a slope of 2–3‰ for drainage. In snow regions, gutter heating cables or pipes may be necessary to prevent ice damming.
- Foundation: The foundation transfers all loads to the ground. For most commercial greenhouses, independent concrete pad foundations under each column are sufficient. In cold climates, the foundation must extend below the frost line — typically 1.2–1.8 m in northern regions. A continuous perimeter grade beam may be added for wind uplift resistance.
Design tip: Always request a structural calculation sheet from your manufacturer. It should show the assumed loads (dead, live, wind, snow), member sizes, and connection details. A supplier who cannot provide this is cutting corners.
Step 4: Foundation Construction
With engineering drawings in hand, site work begins.
- Survey and set out: Mark column positions with a total station or string lines. Verify diagonals to ensure squareness — errors here multiply over a 50+ meter structure.
- Excavate: Dig foundation pits to the specified depth (below frost line in cold climates). Typical pit size: 500×500×800 mm for a 120×120 column.
- Place reinforcement and anchor bolts: Embed base plates with anchor bolts in the concrete. Ensure bolt spacing matches the column footplate exactly. Use a template during pouring to avoid misalignment.
- Pour concrete: Use C25 or C30 concrete. Vibrate to eliminate voids. Allow a minimum of 7 days curing before erecting steel.
- Backfill and grade: Compact backfill around foundations. Grade the site to drain away from the greenhouse perimeter.
Step 5: Frame Erection
Frame assembly is where the structure begins to look like a greenhouse. Work systematically from one end to the other.
Typical sequence:
- Set columns: Place columns on base plates, plumb with a level, and bolt down. Install bracing temporarily to hold them vertical.
- Install gutters: Connect gutters between columns with expansion joints. Check slope with a laser level — water must not pool.
- Hoist trusses/arches: Lift trusses into place and connect to gutter brackets or column tops. Install purlins (longitudinal members) to space the trusses at the designed bay distance.
- Add cross bracing: Install diagonal X-bracing in the end bays and at intervals along the structure to resist longitudinal wind and seismic forces.
- Build end walls and gables: Frame the end walls with vertical and horizontal members to support covering, doors, and fan openings.
Quality check at this stage: Walk the structure. Every connection should be tight, every member plumb and straight. A misaligned truss now will create covering problems later.
Step 6: Covering Installation
The covering is the skin of the greenhouse — it controls light transmission, insulation, and UV protection.
Film installation:
- Pull film over the frame on a calm, warm day (above 15 °C ideally). Cold film is brittle and tears easily.
- Secure with aluminum wiggle wire and lock channel (wiggle wire channel) — this is the industry standard and far superior to battens or rope.
- For double-layer inflation, install two layers and inflate with a small blower (50–100 mm WG static pressure). The air gap adds an insulation value of roughly R-1.5.
PC board installation:
- Use only UV-coated side facing out. Installing it backwards voids the warranty and causes yellowing within 2–3 years.
- Fasten with aluminum profiles and EPDM gaskets. Leave room for thermal expansion (3 mm/m).
- Seal all joints with neutral-cure silicone and breathable tape on the bottom edge to prevent condensation buildup inside the sheets.
Glass installation:
- Glass is typically set in aluminum glazing bars with EPDM gaskets.
- Use tempered safety glass (minimum 4 mm) for roof panels. Hollow glass (e.g., 5+6A+5) improves insulation in cold climates but adds weight and cost.
- Install from the gutter upward, overlapping upper panels over lower ones.
Step 7: Ventilation and Cooling Systems
Even the best-insulated greenhouse is useless without climate control. Proper ventilation prevents overheating, manages humidity, and supplies CO₂.
Natural ventilation:
- Roof vents: Rack-and-pinion or continuous butterfly vents on 15–25% of roof area are the gold standard. They exploit the stack effect — hot air rises and exits through the roof.
- Side vents: Roll-up or hinged side vents admit cool air at plant level. Combine roof and side vents for cross-ventilation.
- Insect netting (40–50 mesh) should cover all openings to exclude pests without significantly restricting airflow.
Mechanical cooling (fan and pad):
- In hot, dry climates, a cooling pad + exhaust fan system can lower interior temperatures by 5–10 °C.
- Evaporative cooling pads (cellulose, 100–150 mm thick) are installed on one end wall; exhaust fans on the opposite end create negative pressure that draws air through the wet pad.
- Size fans for 0.75–1.0 air exchange per minute. Pad area is typically 1 m² per 30–40 m² of floor area.
Circulation fans: Horizontal airflow (HAF) fans keep air moving inside, reducing disease pressure and uniformizing temperature. Install them 3–4 m above the floor, spaced every 20–25 m.
Step 8: Shading and Thermal Screens
Shading and screening systems are essential for both summer cooling and winter energy savings.
- External shade netting: A black or aluminum shade net (30–70% shading rate) deployed above the greenhouse roof reduces solar radiation before it enters. Aluminum nets also reflect infrared, lowering cooling loads. Driven by gear motors and cable-pulley systems.
- Internal thermal screen: An energy-saving screen (typically transparent foil strips or non-woven fabric) closes at night, reducing radiative heat loss by 20–40%. In summer, it can also serve as a daytime shade screen. A dual-screen system (one external, one internal) provides the best climate flexibility.
Step 9: Heating System (Cold Climates)
In regions where winter temperatures drop below the crop’s minimum threshold, a heating system is non-negotiable.
System options:
- Hot water boiler: The most uniform and efficient method for large greenhouses. A natural gas, diesel, or coal-fired boiler heats water, which circulates through steel fin pipes or smooth tubes along the perimeter and under growing benches. Heat output is calculated from the greenhouse envelope area, U-value of the covering, and the design temperature difference. For example, a 1,500 m² PC board greenhouse in a –25 °C climate typically requires 250–400 kW of boiler capacity.
- Hot air heaters: Gas-fired unit heaters are simpler and cheaper to install but less uniform. Best suited to smaller structures or as backup heating.
- Infrared / radiant heating: Tube-style radiant heaters heat objects directly rather than air. They are efficient for high-clearance greenhouses but require careful placement to avoid crop damage.
- Ground-source heat pumps: Increasingly popular for sustainable operations, but high upfront cost and require geological feasibility studies.
Important: Always size the heating system with a 15–20% safety margin. Undersized heating is far more expensive to remedy than oversizing. A plate heat exchanger should separate the boiler loop from the greenhouse loop to protect pipes from corrosion.
Step 10: Irrigation and Fertigation
Water delivery and nutrient management directly impact crop quality and yield.
- Drip irrigation: The standard for greenhouse production. Pressure-compensating drip emitters (2–4 L/h) deliver water and nutrients directly to the root zone, reducing waste and foliar disease. Use two drip lines per plant row for high-wire crops.
- Water-fertilizer integration (fertigation): A proportional fertilizer injector or smart fertigation machine mixes stock solutions into irrigation water at precise EC and pH levels. Commercial systems with multi-channel dosing (typically 4–6 channels for A/B fertilizer + acid) can manage multiple recipes and zones.
- Water treatment: Filter irrigation water through screen and disc filters. For recirculating systems, UV or ozone sterilization prevents pathogen buildup. Test source water for pH, EC, sodium, chloride, and bicarbonate before designing the nutrient recipe.
- Drainage: A proper drainage layer (gravel + drainage mat) under the floor prevents waterlogging, especially in bag or slab culture.
Step 11: Environmental Control and Automation
Modern greenhouses rely on a climate control computer to integrate and automate all systems.
- Sensors: Temperature, humidity, light (PAR), CO₂, and soil/substrate moisture sensors feed real-time data to the controller.
- Controller logic: The climate computer can be programmed with setpoints for day/night temperature, humidity bands, light thresholds, and irrigation schedules. It then autonomously operates vents, fans, heaters, screens, and irrigation valves.
- Remote access: Most modern controllers offer web or mobile app access, allowing managers to monitor and adjust conditions from anywhere.
- CO₂ enrichment: In sealed greenhouses, CO₂ supplementation to 800–1,000 ppm can boost yields by 20–30%. Sources include pure CO₂ cylinders, boiler flue gas (with purification), or natural gas burners.
Step 12: Benching, Growing Systems, and Interior Layout
With the structure and systems in place, configure the interior for production.
- Ground beds: For soil or amended-soil production, form raised beds and install drip tape.
- Gutter-connect growing systems: For high-wire tomatoes, peppers, and cucumbers, install hanging gutters or substrate slabs with a trellis system above.
- Benches: Rolling or fixed benches maximize usable floor space (typically 70–80% utilization). Ebb-and-flow benches for potted plants enable flood irrigation and recycling.
- Vertical farming racks: Multi-tier systems with LED lighting are ideal for seedling production, microgreens, and leafy greens in warehouses or stacked configurations.
- Work areas: Allocate space for a packing station, cold storage, fertilizer storage, and a machinery/electrical room.
Step 13: Final Inspection and Commissioning
Before planting, every system must be tested under real conditions.
- Structural inspection: Check all bolts and clamps for tightness. Inspect welds and galvanizing. Verify door operation and weatherstripping.
- Water test: Run irrigation and fertigation through every zone. Check for leaks, verify pressure, and test backflow preventers.
- Electrical test: Megger-test motor circuits. Verify phase rotation on fans. Test emergency stops and GFCI protection.
- Heating test: Fire the boiler and circulate water. Monitor pipe temperatures and check for air locks. Verify thermostat setpoints.
- Ventilation test: Open and close all vents through their full range. Check limit switches and wind/rain sensors. Confirm emergency power-off functions.
- Controller calibration: Compare sensor readings against calibrated reference instruments. Tune PID loops for smooth, non-cycling operation.
Only after all systems pass should the greenhouse be handed over for production.
Maintenance: Protecting Your Investment
A well-built greenhouse can last 20 years or more — but only with regular maintenance:
- Monthly: Inspect film for tears; check wiggle wire channels; clean fan blades and shutters; verify lubricant levels in gear motors.
- Quarterly: Flush irrigation lines and filters; inspect boiler water chemistry; torque check structural bolts; test CO₂ sensors.
- Annually: Inspect galvanizing for rust (especially at cut ends and welds); replace worn vent seals; check foundation for cracking; descalate heat exchangers; recaulk PC panel joints; replace aging shade screens as needed.
- Pre-winter: Clear gutters of debris; test heating system before the first frost; inspect thermal screen fabric; verify emergency generator.
- Pre-summer: Service cooling pads (clean or replace); check fan belts; verify external shade operation; ensure all vents operate freely.
Conclusion
Building a greenhouse is a multi-disciplinary project — part civil engineering, part mechanical systems, part horticultural science. Cutting corners on structural design, using cheap steel, or skipping proper commissioning will cost far more in repairs and lost crops than the initial savings.
The most successful greenhouse projects share three traits: a clear understanding of the crop and climate before design begins; a manufacturer who engineers to local conditions rather than selling a one-size-fits-all package; and a systematic approach to installation and commissioning.
Whether you are planning a single 80 m tunnel or a 10-hectare high-tech complex, the process remains the same. Plan carefully, choose your partners wisely, and build it right the first time.
About Clover Greenhouse
Clover Greenhouse (Shouguang Sanye Agricultural Technology Co., Ltd.) is a Chinese manufacturer and engineering company with 20+ years of experience in greenhouse steel structure production, full-project construction, and equipment integration. We design and build film greenhouses, solar greenhouses, PC board greenhouses, and Venlo glass greenhouses for clients worldwide — from Mongolia and Central Asia to the Middle East and Africa.
Website: www.clovergreenhouse.com
WhatsApp: +86 15064471385 / +86 15266361331
Email: l15863601385@gmail.com
Ready to start your greenhouse project? Contact us for a free consultation and customized quotation.